Updating the featured content
Contents
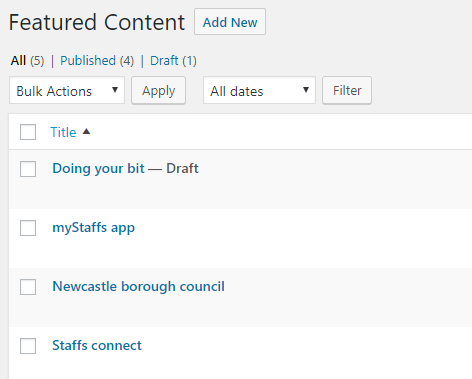
To edit the images or links that appear in the lower section of the homepage, click on the “featured content” editor on the left panel of WordPress. This will bring you to a list of the featured content entries:

To add a new entry, you can click “add new” at the top. To edit an entry, click on the name of the page in the list. They both will take you to the individual entry edit page:

Here you can set the two main parts of the featured content entries, the image and the link.
To set the image of the featured content, you have two options:
- Click on the '+' button to open the media library and select an image to use.
- Enter the address of an image, either on the site or somewhere else on the web.
Whichever you do, the '+' button will change to show the chosen image. Don’t worry about the size of the image because WordPress will change the size of the image to suit the home page.
Important: Ensure the second text box to the right of the image is blank. If this is not blank, it can interfere with the links. When empty, this box should say "Image Link" in grey text.
In this field you should enter the address you want to link to.
When you are happy, click on 'update' (for editing an existing entry) or 'publish' (for creating a new entry) located in the top right of the page.
The featured content articles on the home page are randomly ordered from all the available entries. Only four entries are shown at any time, so if you have more than four entries some will randomly be left out for each user.